DIY reflow oven
So I’ve been messing around with SMD component level repair and building for some time, but for more complex boards with things other than discrete components – a regular hot air station just doesn’t cut it. Also when working with 0402 or smaller, they just get blown away.
The solution to all of this, is to get a reflow oven. The bad part? Expensive. The solution? DIY!
I did some research and there are some things you need to look out for:
- Ideally; you want quartz heaters – as these have low thermal mass, you’re able to switch them fast
- The smaller, the better (well, in relevance to Wattage). Mine is 9L
- Wattage: the more, the better. My 9L oven has 800W
- Thermal Insulation. This is where the cheap ovens suck; they lose heat fast. This can be remedied with ceramic insulation mats. My oven had a double front window, so that already helps a bit.
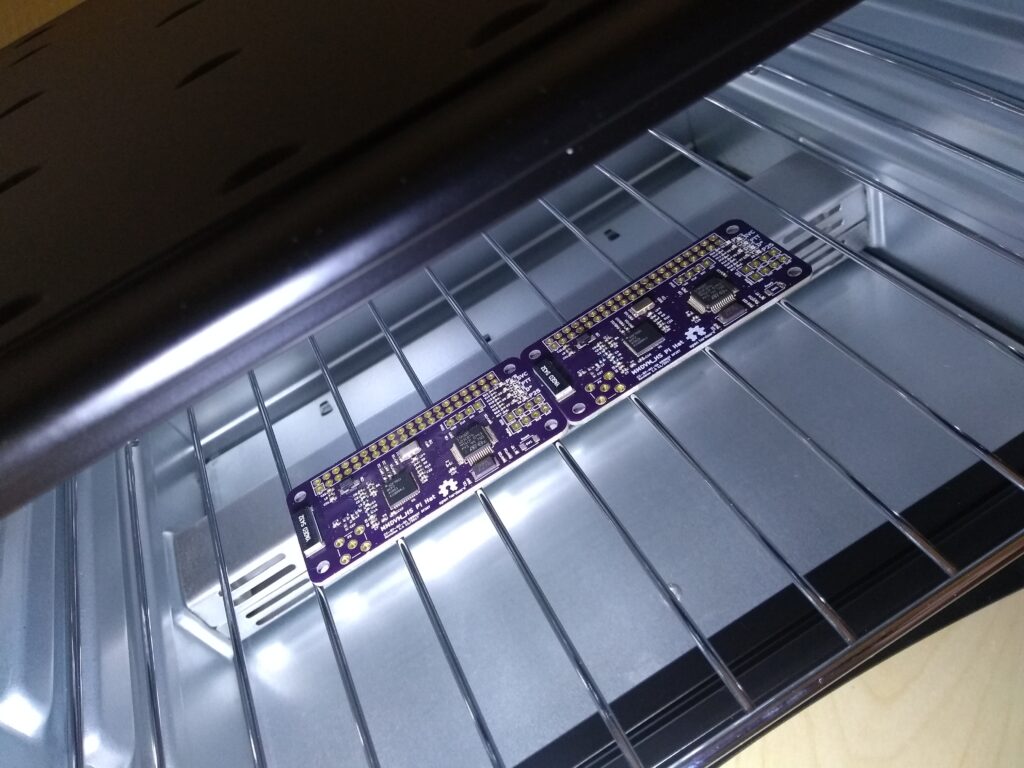
- A fine grill is preferred over a baking plate
I ended up buying a small oven on Amazon, a BlackPear BFO 09. Doesn’t look too bad and actually isn’t bad at all.
How do we turn this into a reflow controller – better yet – how do you reflow boards? The first thing to know, is that in order to do reflowing, you need to get two things:
- Name brand solder: get good solder paste; that can be traced to a real manufacturer
- The reflow profile for that solder paste
What’s a reflow profile look like?

You’ve got 5 phases in a reflow:
- Ramp-up: generally to bring to oven and board to a certain stable point that isn’t too far away from the actual reflow temperature. This helps cope with “lag” due to thermal mass.
- Preheat/soak: every component picks up humidity, even your PCB and solder paste. This phase makes sure everything is gassed out. It’s the longest phase in the reflow profile.
- Ramp to peak: the flux will get activated, components will start to align themselves
- Reflow: once you hit liquidus temperature – the components will further align themselves due to surface tension and get soldered to the PCB.
- Cool-down: you want to cool down fast, but not too fast. We don’t want components failing due to thermal stress.
For home reflow, get leaded paste. Seriously. No you will not die from using this (just wash hands afterwards). No you will not inhale lead fumes (gassing temperature of lead is way higher). It helps keep temperature down, makes better joints, doesn’t grow whiskers,… Get lead!
Okay – back to the oven. So yes: it’s not a matter of just cranking the heat up and cooking it like a cake.
I found a nice looking reflow controller on Tindie (yep – no point reinventing the wheel and I’m also busy with work and family..). It’s a controller created by CraftyCrow. He’s based in the UK so that means no import duty for us EU citizens.
It works with a bluetooth app on your Android Smartphone, so you can have multiple profiles depending on the solder you use. To be honest, the app still has some quirks, BUT I’ve been in contact with CraftyCrow themselves and they reply pretty fast to any questions you have. Also, they’re working on an app update.
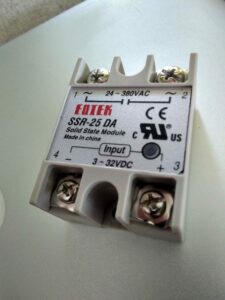
You’ll need a couple more things to finish the build: a Solid State SSR + heatsink (I use a cheap Fotek one, might be a clone, don’t really care), a K-Type thermocouple (an exposed tip is best – you know – the ones where you see the actual weld) and some bits and bobs like a housing and power supply.
The steps to take are the following:
- Bypass the timer (I didn’t bypass the temperature control, as I keep it as failsafe as it’s maximum temperature is higher than the reflow temperature. Think of it as thermal runaway safeguard)
- Put the SSR in series with the quartz heating elements
- Put the thermocouple above the reflow area, i keep it “hovering” above the pcb area, as close to the PCB itself (or even touching it)
- Hook up everything including the powersupply
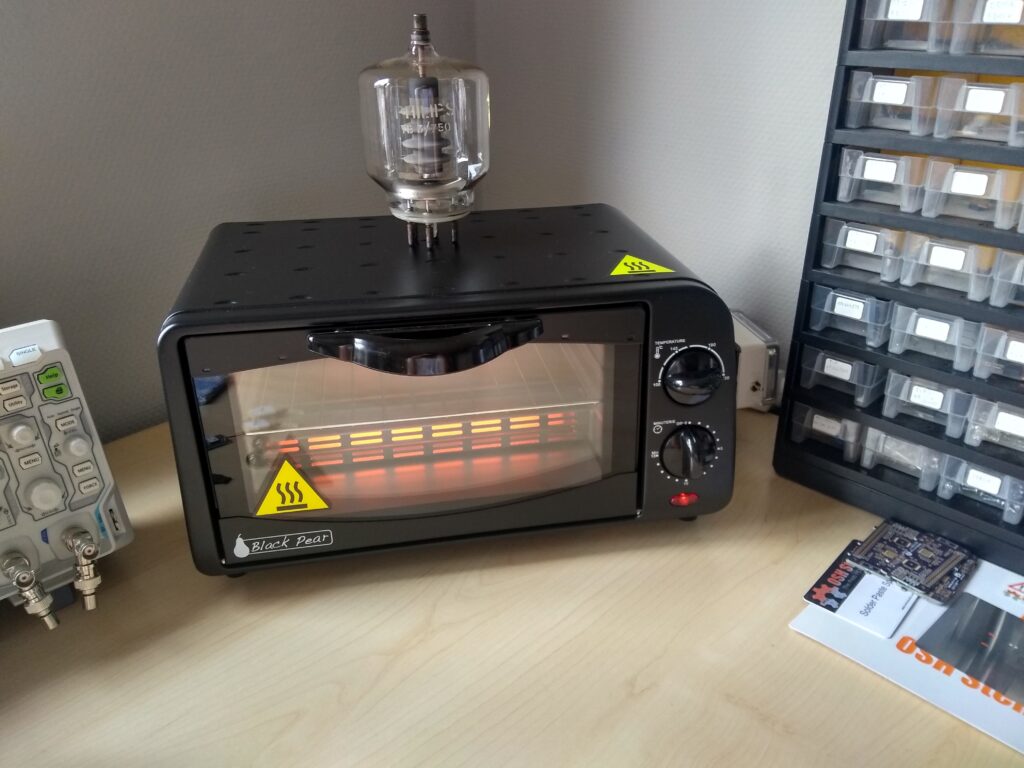
In the end, you end up with something like this. You can barely see the controller hanging on the right side of the oven, mounted on the SSR heatsink (It doesn’t even get warm, so perfectly safe).
The oven tracks the reflow curve amazingly well, considering what I’ve payed for it. For the cool-down phase, I just crack the door open a bit. And it’s fine..
Works great, cost me in total about 80 EUR. Highly recommend building one. Much easier for building items in comparison to a hot air station. Don’t get me wrong: the hot air station is great for rework, but not to do initial assembly.
73’s de ON3AD